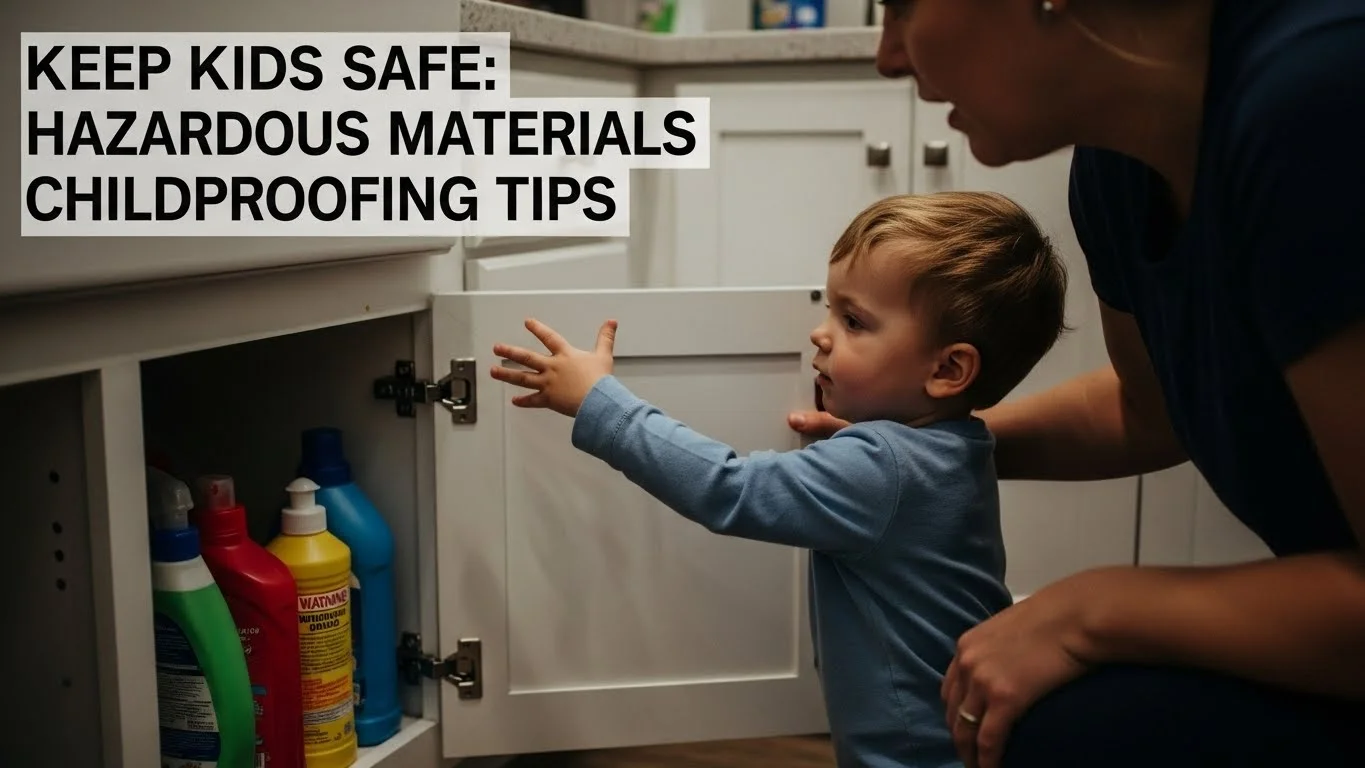
Keeping our kids safe at home is a top priority for every parent. One essential part of that is understanding and managing hazardous materials that can lurk in our everyday surroundings. For more insights on this, check out our Essential Guide to Childproofing from Hazardous Materials.
As a parent, I often find myself thinking about the various ways I can keep my children safe. One area that deserves close attention is hazardous materials found in our homes. These are substances that can pose a risk to our little ones, often hiding in plain sight. The more we understand these hazards, the better we can protect our kids.
Common Household Hazards
When I first started researching household hazards, I was shocked to discover how many common items could actually be harmful. Cleaning supplies, medications, and even some toys can contain substances that are unsafe for children. I remember a time when I left a bottle of bleach on the kitchen counter, thinking it was out of reach. I quickly realized how easy it is for curious little hands to explore areas we think are safe. It’s crucial to recognize these common hazards and take action.
Types of Hazardous Materials
Hazardous materials in our homes can be classified into several categories. I learned that these can include:
Chemicals: This includes cleaning agents, pesticides, and paints. They often contain toxic ingredients that can be harmful if ingested or inhaled.
Medications: Both prescription and over-the-counter medications can be dangerous if not stored correctly. I’ve seen how easily kids can mistake colorful pill bottles for candy.
Household items: Items like batteries, certain toys, and electronic devices can also pose risks, especially if they have small parts that can be swallowed.
It’s important to identify these types of materials in our homes to take proactive measures for safety.
Signs of Potential Hazards
Sometimes, hazardous materials can be less obvious. I’ve learned to look out for specific signs that may indicate a potential hazard. For example, if I notice a bottle of cleaner with a broken seal or a toy with sharp edges, I know immediate action is required. Symptoms of exposure can also include unusual behaviors in children, such as lethargy, vomiting, or skin irritation. Being alert to these signs has helped me address possible dangers before they escalate.
Childproofing Basics: Creating a Safe Environment
Once I became aware of the hazards in my home, I realized that childproofing is more than just a one-time task; it’s an ongoing process. Creating a safe environment for our children is essential, and childproofing plays a vital role in this effort.
Importance of Childproofing
In my experience, childproofing can significantly reduce the risk of accidents and injuries. I remember when my first child started crawling. I felt overwhelmed by the number of things I needed to secure. But I soon discovered that investing time in childproofing pays off. Not only does it protect my kids from immediate dangers, but it also gives me peace of mind to know I’m doing my best to keep them safe.
Childproofing vs. Hazardous Material Awareness
While childproofing focuses on preventing access to potentially dangerous items, being aware of hazardous materials requires a broader understanding. I found that it’s not enough to just childproof cabinets and drawers. We need to educate ourselves about what items in our homes can be hazardous. For example, knowing that certain plants are toxic or that some toys are not age-appropriate can prevent accidents before they happen. It’s a combination of proactive childproofing and awareness that has worked best for me.
As I navigated the world of hazardous materials and childproofing, I learned so much about creating a safe haven for my children. It’s a journey that every parent must undertake, but it’s one worth taking. The more we know, the better equipped we are to keep our kids safe from harm. In the next sections, I’ll share practical tips and insights on identifying hazardous materials and effective childproofing strategies that can enhance safety in our homes.
Identifying Hazardous Materials
Chemicals and Cleaning Supplies
One of the most eye-opening experiences for me as a parent has been discovering the potential dangers lurking in my cleaning supplies. I used to think that as long as I stored these products out of reach, I was doing my job. However, I learned that it’s not just about where you keep them but also what you keep. Many cleaning agents contain harsh chemicals that can be incredibly toxic if ingested or even inhaled. I remember once spilling some bleach while cleaning, and even that small amount made me realize how careful I needed to be with these substances around my kids.
Reading labels became a habit for me. I found that opting for eco-friendly and non-toxic cleaning products not only made my home safer but also reduced harmful fumes. I recommend checking for labels that say “safe for kids” or “non-toxic.” It’s also a good idea to keep these supplies in locked cabinets or designated storage areas that children can’t access. We even decided to switch to more natural cleaning methods using vinegar and baking soda, which has worked wonders for us.
Medications and Supplements
Medications are another area where I’ve had to be extra vigilant. I recall a time when I mistakenly left a bottle of vitamins on the kitchen counter, thinking it was out of reach. My toddler, being the curious little explorer that he is, managed to grab it and opened the cap. Thankfully, I was there to intervene, but that experience taught me a valuable lesson. I realized how crucial it is to keep all medications, including over-the-counter ones, stored in a secured location, preferably in a high cabinet or a locked box.
In my experience, keeping a list of all medications in the house helps too. That way, I can quickly reference what’s available and ensure nothing is left out. I also make it a point to teach my kids that medicine is not candy and should only be taken with an adult’s help. This ongoing conversation has been essential in reinforcing the idea that medications can be dangerous if not handled properly.
Toys and Play Equipment
Toys can be a wonderful source of joy for our children, but they can also hide hazards that we might not immediately recognize. I once found a toy with small detachable parts that my child could easily swallow. It was a wake-up call for me to be more discerning about the toys I bring into our home. I now make it a rule to regularly check toys for wear and tear and to ensure they meet safety standards appropriate for my children’s ages.
When shopping for new toys, I always look for labels that indicate they are non-toxic and free of harmful chemicals. I find that sticking to reputable brands helps ease my mind. Additionally, I ensure that play equipment, such as slides or swings, has no sharp edges and is age-appropriate. Regularly inspecting these items has become part of our routine, and it helps me feel more assured that my kids are playing safely.
Household Plants and Pets
Another surprising area of concern for me has been the plants in our home. I had no idea that some common household plants could be toxic to children and pets. I remember a friend mentioning how their cat had a bad reaction to a plant, which prompted me to research the plants in my own home. I discovered that plants like philodendrons and pothos can be harmful if ingested. Since then, I’ve made it a point to either remove these plants or place them out of reach where my children and pets can’t access them.
Pets themselves can also be a source of potential hazards. I always ensure that pet foods and medications are stored securely. I believe it’s important to teach children how to interact with pets safely and understand their boundaries. This awareness helps create a safer environment for both my kids and our furry friends.
Practical Childproofing Tips
Storing Hazardous Materials Safely
Having learned about the different hazardous materials in our home, I realized that one of the most effective ways to keep my kids safe is to store these items properly. For me, this means dedicating specific cabinets for cleaning products, medications, and any other potentially harmful materials. I invested in childproof locks for these cabinets, which I found to be a worthwhile purchase. It gives me peace of mind knowing that even the most curious little hands can’t easily access them.
One tip that has worked well for us is to keep hazardous materials in their original containers. This way, I can easily reference the safety information on the label if needed. Additionally, I make it a point to regularly check and dispose of any expired products. It’s a simple step, but it ensures that I’m not keeping anything that could be dangerous, even if it’s just sitting in the back of a cabinet.
Using Childproof Locks and Latches
Childproof locks and latches have become my best friends in this journey. I’ve placed these on cabinets and drawers that contain anything potentially harmful. The installation process was surprisingly easy, and it gave me instant peace of mind. I remember the first time we had guests over with young kids, and I felt proud knowing that I had taken steps to secure our home. It’s all about creating an environment where kids can explore without coming across hidden dangers.
Labeling Hazardous Items
One practice I adopted that has proven beneficial is labeling. I found it helpful to label not only the containers of hazardous materials but also the areas where I store them. This way, I can quickly remind myself and others in my household about the importance of these items. I often use bright stickers or colors to make them stand out. It’s a small adjustment, but it reinforces the concept of safety and keeps hazardous materials top of mind for everyone.
Creating a Safe Play Area
Creating a designated play area in our home has been one of the best decisions for our family. I set up a space that is free from hazardous materials and filled with toys that are safe and age-appropriate. This area is not only a safe haven for my kids, but it also allows me to relax while they play. I regularly check this space to ensure that it remains hazard-free, and I’ve noticed that it encourages my children to engage in safe play, which is a huge win for all of us.
First Aid and Emergency Preparedness
What to Do in Case of Exposure
Even with all the precautions we take, accidents can happen. One thing I learned is that knowing what to do in case of exposure to hazardous materials can make a huge difference. I remember the first time I panicked when my child accidentally spilled a little cleaning solution on her skin. Thankfully, I had read about the importance of staying calm and acting quickly. The first step is to assess the situation. If I notice any signs of distress, such as difficulty breathing or unusual behavior, I immediately call for help. It’s crucial to have the poison control number saved on my phone for quick access.
In cases of skin contact, I’ve learned to wash the area with plenty of water and soap as soon as possible. For ingested substances, I always check the product label for specific instructions. Some products advise against inducing vomiting, which is something I hadn’t considered before. Having a basic understanding of first aid measures related to hazardous materials has given me a sense of empowerment as a parent. I encourage every parent to familiarize themselves with these procedures; it’s an essential part of keeping our kids safe.
Creating an Emergency Contact List
Alongside knowing first aid, I found that having an emergency contact list is invaluable. I created a list that includes not only important numbers, like poison control and our family doctor but also nearby hospitals and emergency contacts. This list hangs on our fridge, easily visible and accessible for anyone who might need it. I also made sure to include my children’s doctor and a neighbor who can step in if needed.
Involving my partner in creating this list made it a family affair. We both agreed on what numbers are important to have on hand, and we even discussed some scenarios that might require us to use those numbers. It’s comforting to have this information organized and at our fingertips, ready for emergencies. I believe that being prepared is half the battle in ensuring our children’s safety.
Having a First Aid Kit Ready
No safety plan is complete without a well-stocked first aid kit. I used to think any old box would do, but I quickly learned that having a designated first aid kit tailored to our family’s needs is essential. I remember the first time I needed to use it; my child fell while playing and scraped her knee. Having bandages, antiseptic wipes, and ointment ready made it so much easier to comfort her and treat the wound.
I’ve taken the time to customize our kit with items specific to our family’s needs. For instance, I included allergy medications since my kids have seasonal allergies. Regularly checking and restocking the kit has become part of my routine. I encourage everyone to do a quick inventory every few months. This way, we can ensure that everything is up-to-date and ready for any minor emergencies that might arise.
Educating Children About Safety
Age-Appropriate Safety Discussions
One of the most significant steps I’ve taken in keeping my kids safe is to educate them about safety in a way that’s appropriate for their age. I remember the first time I sat down with my oldest to talk about household hazards. We turned it into a game, where I pointed out different items around the house and asked her whether she thought they were safe or not. It was a fun and interactive way for her to learn, and I was surprised by how much she absorbed from our conversation.
As my children grow, I adjust our discussions to align with their maturity and understanding. I think it’s crucial to empower them to ask questions and express their concerns. The more they know, the better equipped they are to recognize dangers in their environment. I firmly believe that safety is a shared responsibility, and instilling this knowledge in my kids helps them feel confident in making safe choices.
Teaching Kids to Recognize Hazards
Another vital part of our safety education is helping the kids learn how to recognize hazards. I often point out things like electrical outlets, cleaning supplies, and even certain types of toys during our everyday routines. I encourage them to think critically about their surroundings. For example, when we’re at a friend’s house, I remind them to look for potential dangers and to ask me questions if they’re unsure. This habit builds their awareness and helps them understand that safety extends beyond our home.
We also practice safety scenarios. For instance, I might ask, “What would you do if you found a sharp object on the floor?” This engages them in thinking about the steps they can take to stay safe. I find that these discussions not only prepare them for real-life situations but also create open lines of communication between us.
Encouraging Safe Behavior
Encouraging safe behavior in our kids has been one of the most rewarding experiences. I try to make safety a positive aspect of our daily lives rather than a series of restrictions. I often praise my children when I see them making safe choices, whether it’s putting away toys after playing or being cautious around our pets. This reinforcement helps them understand that safety is a priority, and it makes them more likely to continue those behaviors.
We also incorporate safety rules into our family routines. Simple rules like “no running inside” or “always wash your hands after playing outside” serve as reminders that safety is an everyday practice. I believe that consistency is key. The more we integrate these safety principles into our daily lives, the more natural they become for our kids.
Frequently Asked Questions
What are hazardous materials commonly found in homes?
Hazardous materials in homes can include cleaning supplies, medications, and certain toys that contain unsafe substances for children. Chemicals like cleaning agents, pesticides, and paints, as well as medications and household items like batteries, can pose risks to kids.
How can I identify potential hazards in my home?
To identify potential hazards, look for signs such as broken seals on cleaners, toys with sharp edges, and unusual behaviors in children, like lethargy or skin irritation. Regularly checking household items and being aware of what may pose risks is crucial.
Why is childproofing important?
Childproofing is essential as it significantly reduces the risk of accidents and injuries in the home. It helps to secure potentially dangerous items, giving parents peace of mind and allowing children to explore safely. For more on this topic, read our article on Childproofing Essentials: Best Safety Gates Reviewed.
What steps can I take to store hazardous materials safely?
Store hazardous materials in specific cabinets with childproof locks, keep them in their original containers for easy reference, and regularly check for expired products to ensure safety.
How can I educate my children about safety?
Educating children about safety can be done through age-appropriate discussions, interactive games to identify hazards, and encouraging them to ask questions about their environment. Practicing safety scenarios can also help reinforce their understanding.
What should I include in a first aid kit?
A well-stocked first aid kit should include bandages, antiseptic wipes, ointment, and any medications specific to your family’s needs, such as allergy medications. Regularly checking and restocking the kit is important to ensure readiness for emergencies.
How can labeling hazardous items help in a home?
Labeling hazardous items and their storage areas serves as a visual reminder of safety and helps reinforce the importance of these items to everyone in the household, promoting awareness and caution.
What precautions should I take with medications in my home?
Keep all medications, including over-the-counter ones, stored in a high cabinet or locked box. Educate children that medicine is not candy and should only be taken with adult supervision.
Why is it important to create a safe play area for children?
A safe play area free from hazardous materials allows children to play without encountering hidden dangers. It also provides peace of mind for parents, knowing their children are playing in a secure environment.
What should I do in case of exposure to hazardous materials?
In case of exposure, assess the situation and look for signs of distress. For skin contact, wash the area with water and soap; if a substance is ingested, check the product label for specific instructions. Keeping the poison control number accessible is also crucial.
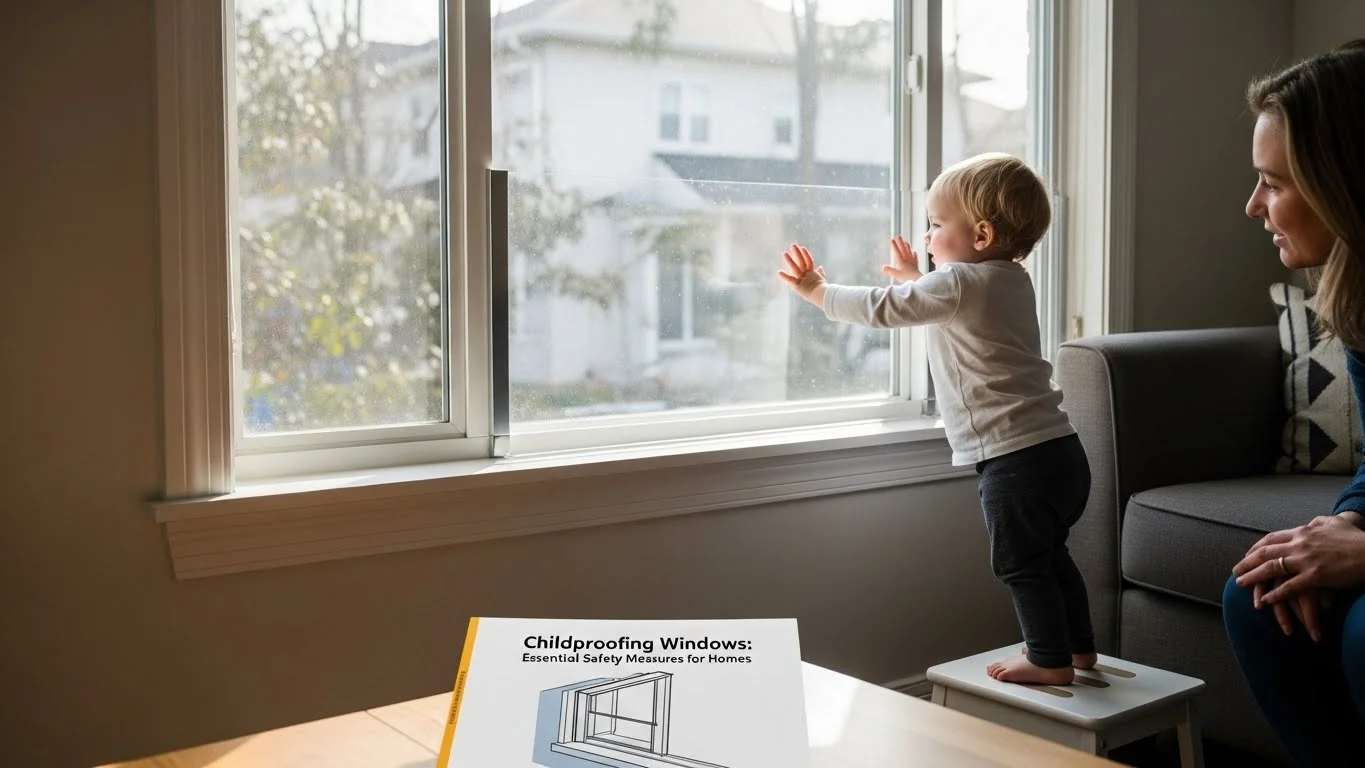
Childproofing windows is a crucial step in ensuring our little ones are safe at home. With the right measures, we can prevent accidents and provide peace of mind for parents and caregivers alike. Read Interesting article: Traveling with Kids: Ensure Home Electrical Safety First
Childproofing Windows: Essential Safety Measures for Homes
Understanding the Importance of Childproofing Windows
As a parent, I often think about the safety of my children, especially when it comes to areas in our home that might seem harmless but can pose significant risks. One area that frequently gets overlooked is windows. I remember a friend of mine expressing her anxiety over her toddler’s curiosity about windows, and I realized that this concern is much more common than I thought. Childproofing windows is not just a minor detail; it’s an essential measure to protect our kids from potential accidents.
The Risks of Unsecured Windows
Windows can be surprisingly dangerous for young children. I’ve seen it firsthand when my own kids, filled with wonder and exploration, looked outside and climbed on furniture to get a better view. Unsecured windows can lead to tragic falls, which can result in severe injuries or even worse. In my experience, the typical reaction we have when we hear a child has fallen out of a window is disbelief. How could this happen? But it only takes a moment of distraction for a child to lose their balance and tumble out. I truly believe that understanding these risks is the first step toward prevention.
Statistics on Window-Related Accidents
Statistically speaking, the numbers are alarming. I recently came across a study that indicated thousands of children are treated each year for injuries related to window falls. This statistic is one that no parent should take lightly. In fact, I remember reading that children aged one to five are particularly at risk, which made me reflect on how crucial it is to implement safety measures in homes with little ones. The thought of a preventable accident is something I can’t shake off easily, and it motivates me to be proactive in childproofing our own home.
Legal Requirements and Building Codes
In many places, there are legal requirements and building codes that address window safety, especially in homes with young children. When we renovated our house, I took the time to research these codes to ensure we met all necessary safety standards. I found that some regions require window guards or safety screens for homes with kids. Understanding these regulations not only keeps our children safe but can also protect us from legal liabilities. I think it’s essential for every parent to familiarize themselves with these laws in their area, as they are designed to safeguard our little ones.
As I navigated this world of safety precautions, it became apparent that childproofing windows is not just about installing locks or screens; it’s an ongoing commitment to our children’s well-being. I remember the first time I installed window locks in our home. I felt a sense of accomplishment, knowing that I was taking an important step toward keeping my kids safe.
Moreover, childproofing windows is just one piece of the puzzle. It’s about creating an overall safe environment, being aware of how children interact with their surroundings, and staying vigilant. In our case, we made it a family project. My kids helped me select window safety products, turning it into a fun and educational experience. They learned about safety while feeling involved in the process, which made the entire effort more meaningful. Read Interesting article: Essential Electrical Safety Tips for Family Travel
In the next sections, we will explore specific childproofing measures that can be implemented to ensure our windows are safe. I am excited to share these insights because I know how overwhelming it can be for new parents to figure out where to start. Let’s dive into some key strategies that can make a significant difference in child safety at home.
Key Childproofing Measures for Windows
Now that we’ve established why it’s so important to childproof our windows, let’s discuss some practical measures we can take to enhance safety in our homes. I remember when I was first researching ways to make our windows safer; it felt overwhelming. But once I started breaking it down, I found that there are several straightforward solutions that make a big difference. Here are some key childproofing measures that I found to be effective.
Window Locks and Latches
One of the simplest and most effective ways to childproof windows is by installing window locks and latches. I was amazed at how many different types were available when I went shopping for them. There are sliding locks, sash locks, and many other options that cater to various window styles. I decided to install locks on all our windows, ensuring they were out of reach for the kids. It gave me peace of mind knowing that even if they tried to open the window, they wouldn’t be able to. I recommend looking for locks that are easy for adults to operate but challenging for little hands to figure out.
Window Guards and Screens
Window guards and screens are another essential component of childproofing windows. I’ll never forget the day we put up our window guards; it felt like a major step in securing our home. These guards act as a barrier, preventing children from falling out while still allowing fresh air to circulate. I chose guards that were easy to install and designed for easy removal in case of emergencies. For me, that balance between safety and accessibility was crucial. Additionally, having screens can also help keep bugs out while ensuring the windows are secure, which is a win-win!
Safety Window Film
Safety window film is something I hadn’t considered until I spoke with other parents in my community. This film is applied directly to the glass and works to hold shattered pieces together if the window breaks. I found it particularly useful because it can help prevent injuries from sharp glass shards. The installation process was straightforward, and it added a layer of protection without changing the appearance of our windows. I’ve learned that being proactive about potential accidents can make a huge difference, and safety window film is a small investment for a lot of peace of mind.
Limiters and Stoppers for Sliding Windows
Sliding windows can be a bit tricky when it comes to child safety. I remember being nervous about our sliding glass doors, as they seemed like an easy way for our kids to venture outside unsupervised. That’s when I discovered window limiters and stoppers. These handy devices restrict how far a sliding window can open. I installed limiters that allow the window to open just a few inches, enough for ventilation but not enough for a child to squeeze through. It felt like a simple solution to a major concern, and I felt relieved knowing I had taken steps to keep my kids safe. Read Interesting article: Healthy Breakfasts on a Budget: Quick Ideas for Travelers
Types of Windows and Specific Safety Solutions
It’s important to remember that not all windows are the same, and different types require different safety solutions. Each type of window presents unique considerations, and I learned a lot by understanding how to approach each one. Let’s take a closer look at some common window styles and the specific safety measures that work best for them.
Single-Hung Windows
Single-hung windows are a popular choice in many homes, and they can be made safer with locks on the lifting mechanism. I found it helpful to install additional locks at the top of the window to prevent it from being opened from the inside. This way, my children cannot reach them, and it keeps the window securely closed. I also recommend ensuring that any cords from window treatments are out of reach or secured to avoid potential strangulation hazards.
Double-Hung Windows
Double-hung windows can be a bit more challenging since both the top and bottom sections can open. What worked for me was placing childproof locks on both sashes. I also made sure that if we did want to open one, we would only open the top window while keeping the bottom one locked. This not only helps with air circulation but also keeps curious little hands away from the opening.
Sliding Windows
For sliding windows, I found that removable locks are an excellent solution. They can be installed to prevent the sliding pane from being opened too far. I also added stoppers so that the window couldn’t be opened wide enough for my children to fit through. This gave me confidence that even if they tried to slide the window open, they would be unable to do so completely.
Casement Windows
Casement windows open outward and can also pose risks. For these, I installed window locks that secure the window when it’s closed. I also made sure to keep furniture away from them, as I’d heard stories of children climbing to reach the window handle. It’s all about being one step ahead, and I noticed that keeping the area around these windows clear significantly reduced the risk.
Awning Windows
Awning windows are hinged at the top and open outward. Like casement windows, I secured these with locks and added a cautionary measure of window restrictors. I felt it was essential to educate my kids about how these windows work and why they shouldn’t try to open them by themselves. I believe the more we involve our children in the conversation about safety, the more they understand the importance of being careful.
Best Practices for Childproofing Windows
After taking significant steps to childproof our windows, I realized that it’s not just about installing safety devices; it’s also about following best practices to ensure ongoing safety. I found that being proactive in maintaining these safety measures can make a huge difference. Here are some best practices that I’ve learned through experience and conversations with other parents.
Regular Maintenance and Inspections
Regular maintenance is something I’ve come to appreciate more as a parent. I remember the first time I did a thorough check of our window locks and guards. I was surprised at how quickly dust and grime could build up, potentially affecting their functionality. I’ve made it a habit to inspect our windows at least twice a year—once in the spring and again in the fall. During these inspections, I check to make sure all locks are working correctly, and I also look for any signs of wear or damage. If I notice anything that doesn’t look right, I either repair it or replace it promptly. This simple practice has given me peace of mind, knowing that I’m taking care of the safety measures we’ve put in place.
Educating Children About Window Safety
Involving my kids in the conversation about window safety has been one of the most effective strategies I’ve adopted. I believe that education is a powerful tool. I remember sitting down with my children and explaining why we have window guards and locks. We talked about the importance of being cautious around windows and how they should never try to open them without an adult present. It was heartwarming to see them grasp the concept, and I think it made them feel more responsible. I encourage other parents to have similar conversations with their kids, making it a part of daily safety discussions. I find that the more we talk about safety, the more instilled it becomes in their minds.
Creating a Safe Play Environment
Creating a safe play environment has been essential in reducing risks around our windows. I remember when my kids were younger, I had to rearrange their play areas to minimize their access to windows. I moved furniture away from windows to prevent them from climbing. By doing this, I felt like I was taking an extra step in ensuring their safety. Additionally, I realized that keeping toys and play equipment away from windows discourages climbing. I also made sure that any play areas were supervised, especially when the children were exploring their space. Setting boundaries and encouraging safe play habits has made a significant difference in our home.
Additional Safety Tips for Homes with Young Children
As I continued to learn about home safety, I discovered several additional tips that can enhance our efforts in childproofing windows. With all the excitement of having little ones, it can be easy to overlook these crucial aspects, but I found them to be quite helpful.
Furniture Placement and Window Access
The placement of furniture in relation to windows is something I never thought much about until I saw my kids attempting to climb onto a chair to get a better view outside. I quickly realized that strategically arranging furniture can prevent access to windows. I made sure that tall dressers or tables were not positioned near windows, thus eliminating any climbing hazards. I often recommend to friends to take a good look around their living space and think about how furniture placement could impact child safety. It really makes a difference in reducing accidental falls.
Using Window Treatments Safely
Window treatments can also pose unforeseen dangers. I used to love having long drapes, but I learned that cords could become a strangulation hazard. After some research, I decided to switch to cordless options, which not only look neat but also provide an extra layer of safety. I also ensure that any blinds or shades are tightly secured and that cords are out of reach. I can’t stress enough how important it is to look for child-safe window treatment options when redecorating or updating your home.
Emergency Response Preparedness
Finally, I believe that being prepared for emergencies is crucial. I took the time to create an emergency plan that includes what to do in case of a fall or other incidents involving windows. I sat down with my family to discuss our plan, ensuring everyone knew who to contact and what steps to take. Additionally, I keep a list of emergency numbers in a visible location, making it easy for everyone to find help quickly if needed. Knowing that we have a plan in place gives me a sense of security, and I think it’s important for every family to be prepared.
DIY Childproofing Solutions
Cost-Effective Options for Families
As I explored ways to childproof our windows, I realized that not all solutions have to break the bank. I found numerous DIY options that can be both effective and affordable. For example, using tension rods and fabric to create makeshift window guards is a simple and cost-effective solution. I remember doing this in our playroom, and my kids loved the colorful designs we picked out together. It felt rewarding to create a safe environment without spending a fortune.
Step-by-Step Guides for Installation
When I first started childproofing our windows, I found that having a clear plan was essential. I often turned to online resources for step-by-step guides on installing various safety measures. Whether it was putting up window guards or applying safety window film, having a detailed guide made the process much smoother. I recommend looking for resources that offer visual instructions; they can be incredibly helpful for anyone who may not feel confident tackling these projects on their own.
Frequently Asked Questions
Why is childproofing windows important?
Childproofing windows is crucial to ensure the safety of young children at home, as unsecured windows can pose significant risks, including falls that may result in severe injuries.
What are the risks associated with unsecured windows for children?
Unsecured windows can lead to tragic falls, especially when children climb on furniture to look outside. A moment of distraction can result in a child losing their balance and tumbling out of a window.
What statistics exist regarding window-related accidents?
Thousands of children are treated each year for injuries related to window falls, with children aged one to five being particularly at risk. This highlights the need for implementing safety measures in homes with young children.
Are there legal requirements for window safety in homes with children?
Yes, many regions have legal requirements and building codes that address window safety, which may include mandates for window guards or safety screens to protect children.
What are some key childproofing measures for windows?
Key measures include installing window locks and latches, window guards and screens, safety window film, and limiters or stoppers for sliding windows, which help enhance safety.
How can I make single-hung windows safer for children?
To make single-hung windows safer, install locks on the lifting mechanism and additional locks at the top of the window to prevent it from being opened from the inside.
What are the best practices for maintaining childproof windows?
Regular maintenance and inspections of window locks and guards are essential. Inspect windows at least twice a year and educate children about window safety to ensure ongoing safety.
How should furniture placement relate to window safety?
Furniture should be strategically arranged to prevent children from climbing to reach windows. Avoid placing tall dressers or tables near windows to reduce climbing hazards.
What DIY options are available for childproofing windows?
Cost-effective DIY options include using tension rods and fabric to create makeshift window guards, which can be both effective and affordable.
What should be included in an emergency response plan for window incidents?
An emergency response plan should outline steps to take in case of a fall or window-related incident, including contact information for emergency services and ensuring all family members are familiar with the plan.
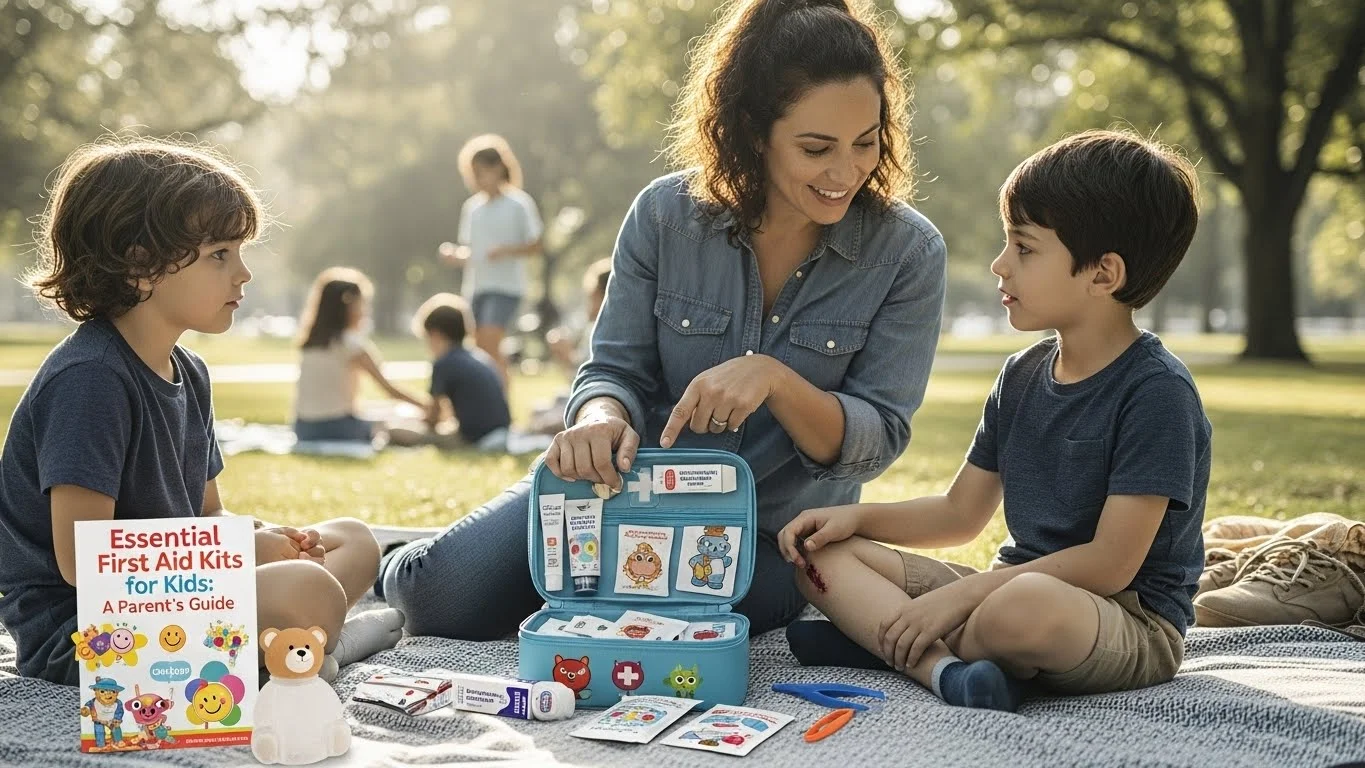
As parents, we want to keep our kids safe and healthy. One vital tool in that mission is a well-stocked first aid kit tailored for kids. Knowing what to include can make all the difference in an emergency. Read Interesting article: First Aid Basics for Kids: Keep Your Family Safe on Adventures
Essential First Aid Kits for Kids: A Parent's Guide
Understanding the Importance of First Aid Kits for Kids
Why Every Parent Needs a First Aid Kit
When I first became a parent, the thought of my child getting hurt was terrifying. However, I quickly learned that accidents happen, and being prepared is the best way to handle those moments. A first aid kit for kids isn’t just a nice-to-have; it’s essential. It provides reassurance, knowing that we can address minor injuries quickly and effectively. Plus, it empowers us to handle emergencies with confidence, instead of panic.
Every family can face different scenarios, whether it’s a scraped knee from a fall at the park or a bee sting during a picnic. Having a first aid kit readily available means we’re not scrambling for supplies in a moment of crisis. I always recommend keeping it stocked and easily accessible for those unexpected bumps in the road.
Common Injuries and Emergencies in Children
Through my experiences as a parent, I’ve encountered a variety of common injuries that kids tend to have. Understanding these helps us prepare our first aid kits appropriately. Some frequent occurrences include:
Cuts and Scrapes: Kids are naturally curious and adventurous, which often leads to minor injuries. I’ve lost count of how many times I’ve had to clean up a scraped knee after a tumble.
Burns: Whether from touching something hot in the kitchen or getting too close to a campfire, burns can happen quickly. I learned to be extra cautious during cookouts.
Insect Bites and Stings: Summer brings out the bugs, and I’ve seen my kids get stung or bitten more times than I can count. Having an antihistamine is a must!
Allergic Reactions: Kids can develop allergies to various things. In my case, having an EpiPen on hand for my child’s peanut allergy has been crucial.
Fever: When my child gets sick, I often need to monitor their temperature and manage any fever that arises.
These are just a few examples, but they highlight the importance of having a first aid kit that’s tailored to our kids’ specific needs. I’ve learned that being prepared can help ease our worries when accidents happen.
Essential Components of a First Aid Kit for Kids
Adhesive Bandages and Gauze
One of the first things I always include in our first aid kit is a variety of adhesive bandages. Kids can be prone to scrapes and cuts, and having colorful band-aids can brighten their mood while providing protection. I also recommend including gauze pads for larger wounds. They’re essential for covering big scrapes and help stop bleeding.
Antiseptics and Antibiotic Ointments
After cleaning a wound, applying an antiseptic is crucial to prevent infection. I’ve always kept antiseptic wipes handy for quick cleaning on the go. Additionally, an antibiotic ointment can be a lifesaver for minor cuts; it helps speed up the healing process and keeps the area protected. I’ve found that having both in our kit has made a significant difference in how well we manage minor injuries.
Thermometers and Fever Management
Monitoring my child’s health is a top priority, especially when they’re feeling under the weather. Having a digital thermometer in our first aid kit has been indispensable. It allows us to track fevers accurately, ensuring we can respond appropriately. I also recommend including fever-reducing medications, like children’s acetaminophen or ibuprofen, to help manage discomfort when needed. Trust me; it’s a relief to have these on hand when my kids start feeling ill.
Cold Packs and Heat Packs
I’ve learned that cold packs are essential for treating bumps and bruises. They can reduce swelling and provide pain relief. I always keep a reusable cold pack in the freezer, ready to use. On the other hand, heat packs are excellent for soothing sore muscles after an active day. Having both ensures we’re ready for all sorts of minor injuries.
Scissors and Tweezers
While it might seem simple, having a pair of scissors and tweezers in our first aid kit has proven invaluable. I’ve used scissors to cut gauze or tape, making it much easier to treat a wound. Tweezers are essential for removing splinters or ticks, which can happen to adventurous kids. I’ve had my fair share of splinter removal sessions, and having the right tools has made all the difference!
Emergency Contact Information
No first aid kit is complete without important contact information. I’ve always included a list of emergency contacts, including our pediatrician’s number and nearby hospitals. It’s a good idea to have this information handy in case we need to make calls quickly. I also recommend keeping any medical information, like allergies or existing conditions, in the kit. This can be crucial during emergencies.
Age-Specific Considerations for First Aid Kits
First Aid Kits for Infants
When it comes to infants, the challenges are different. I remember the first time my baby had a cold; I felt so helpless. For infants, a first aid kit should be tailored to their unique needs. I always made sure to include items like infant acetaminophen or ibuprofen, which are crucial for managing fevers. It’s also essential to have a digital thermometer designed for infants, as they can be quite sensitive to temperature changes.
Another important addition is a nasal aspirator. Infants often struggle with congestion, and having a way to help clear their nasal passages can be a lifesaver. Additionally, I recommend including small-sized adhesive bandages, gentle antiseptic wipes, and possibly some soothing ointments for diaper rashes or minor skin irritations. Keeping these items organized and easily accessible helped me feel more prepared for any little emergencies that popped up.
First Aid Kits for Toddlers
Toddlers are a whirlwind of energy, and with that energy comes an increased risk of minor injuries. Our experience with our toddler taught us that having a well-equipped first aid kit can make all the difference. In addition to the essentials like adhesive bandages and antiseptics, I found it helpful to have items that would make the child feel comfortable, like fun band-aids featuring their favorite characters.
It’s also wise to include a small supply of antihistamines to address allergic reactions, especially since toddlers can be prone to food allergies. I remember the time my little one broke out in hives after trying a new snack; having the necessary medication on hand allowed us to handle the situation swiftly. I would also suggest adding teething gels and cooling pads for those tough teething days, which can be a little rough for our little ones.
First Aid Kits for School-Aged Children
As kids enter school, they encounter a whole new world of play and exploration. I quickly realized that the first aid kit for school-aged children needs to adapt to their growing independence. In addition to the basics, I always ensured that our kit contained items such as instant cold packs, which are perfect for those inevitable bumps during recess or sports.
Another item I recommend is a small first aid manual tailored for kids. It can help them understand what to do in case of minor injuries. I remember when my child got a scrape at school; having a basic understanding of first aid made her feel empowered and capable. It’s also crucial to include any medications that your child may need, especially if they have specific allergies or conditions. Ensuring they know where to find their medication in the kit is also a great idea.
First Aid Kits for Adolescents
As kids transition into their teenage years, their needs change yet again. They’re often more active and involved in various sports and activities, so our first aid kit for adolescents needs to be more comprehensive. I found it helpful to include items like elastic bandages for sprains or strains, as well as splints for more serious injuries. Having a small first aid manual that covers more complex injuries can also be beneficial.
Teens are more likely to encounter situations where they need to take charge of their own first aid. I think it’s essential to involve them in assembling their kit, letting them choose specific items they feel would be important. It empowers them and gives them a sense of responsibility. Also, adding some basic over-the-counter medications, like pain relievers, can be helpful for headaches or menstrual cramps. The goal is to create a kit that they feel comfortable using and can manage themselves.
How to Assemble a Personalized First Aid Kit
Choosing the Right Container
When I first started putting together our family’s first aid kit, I learned that choosing the right container is just as important as what goes inside. I prefer a sturdy, waterproof container that is easy to carry. It should have enough space to hold all the essentials without being too bulky. I found that a clear container allows me to see everything at a glance—no more digging around trying to find a specific item during an emergency.
Essential Items to Include
Along with the items we’ve already discussed, there are a few more essentials I always include. A flashlight with extra batteries can be incredibly useful in case of a power outage or if you need to check an injury in the dark. I also suggest keeping a small notepad and pen in the kit. It’s handy for jotting down important information or symptoms in case you need to relay them to a doctor later.
Customizing for Specific Needs (Allergies, Conditions)
Every family is unique, and that means our first aid kits should be too. I took time to customize our kit based on my children’s specific needs. For example, since one of my kids has a peanut allergy, I made sure to include an EpiPen and instructions for use. We also have a small supply of allergy medications, just in case. I recommend evaluating your family’s medical history and any specific conditions to ensure your kit is fully prepared for any situation that may arise.
Where to Store Your First Aid Kit
Accessibility and Safety Considerations
Storing our first aid kit may seem straightforward, but I’ve learned that accessibility and safety are critical factors. I want to ensure that I can reach the kit quickly if an emergency arises, but I also need to keep it out of reach of little hands. I remember a time when my toddler was curious and got into our cabinet, so I realized I needed to be more mindful about where we kept it. I recommend placing the kit in a high, secure location that adults can access easily but children cannot. This way, we’re prepared without putting our kids at risk of getting into the supplies.
Locations Around the Home
In our home, we have a few key spots where we store our first aid kit. The main kit resides in the kitchen, as it’s often the hub of activity and where most accidents happen. Having it close by means I can grab it quickly while I tend to a scraped knee or a fever. Additionally, I keep a smaller kit in the bathroom. It’s become incredibly useful for managing minor injuries and ailments that occur during bath time or while getting ready in the morning.
Another great spot is the family car. I learned that keeping a travel-sized first aid kit in the car is invaluable during outings. Whether we’re on a day trip or just driving around town, we’re always prepared for minor bumps or scrapes. I suggest checking the car kit regularly to ensure that it’s stocked and ready to go. Having these kits in strategic locations has made me feel much more secure knowing I’m ready for anything that comes our way.
On-the-Go Kits for Travel and Outings
Whenever we go on trips or outdoor adventures, I always pack a portable first aid kit. I’ve found that it’s essential to have supplies handy, especially when we’re away from home. I usually include travel-sized versions of our essentials, like adhesive bandages, antiseptic wipes, and any necessary medications. I also make sure to add items specifically suited for our activities, such as insect bite relief when we head to the beach or hiking trails.
One of my favorite tips is to use a small, zippered pouch to keep the travel kit organized. This way, I can easily toss it into our backpack or luggage without worrying about items spilling everywhere. Plus, the convenience of having a well-prepared kit on hand gives me peace of mind, knowing we’re ready to tackle any minor injuries or discomforts that may arise during our adventures.
Teaching Kids About First Aid
How to Explain First Aid Concepts to Children
As my kids have grown, I’ve realized the importance of teaching them about first aid. I want them to feel empowered and knowledgeable in case they ever need to help themselves or others. I began by explaining the basics in a way that was easy for them to understand. I remember using simple language and examples from our experiences, like how to clean a scrape or why we need to put a bandage on a cut.
We often role-play scenarios, which not only makes it fun but helps reinforce their learning. For instance, I might pretend to get a scratch while we’re playing, and they’ll take charge by retrieving a band-aid and applying it correctly. This hands-on approach has worked wonders; I’m always amazed at how quickly they pick things up. Involving them in discussions about what to do in case of an emergency has also helped to ease their fears about getting hurt.
Basic First Aid Skills Every Child Should Know
There are a few essential skills every child should have, and I’ve made it a point to teach these to my kids. First, they should understand how to clean a wound properly and apply a bandage. I’ve shown them how to use antiseptic wipes and the importance of keeping the area clean to avoid infection.
Another crucial skill is recognizing when to ask for help. I encourage my kids to speak up if they’re hurt or if someone else is injured so they can seek assistance from an adult. Additionally, teaching them how to identify signs of serious issues, like difficulty breathing or excessive bleeding, is vital. I believe that by equipping them with these skills, they’ll feel more confident and capable in emergency situations.
Finally, I make sure they know how to contact emergency services. Teaching them how to use a phone to call for help has been a game-changer. I think it’s important for them to practice this, so they know exactly what to do if they ever find themselves in a situation where they need help.
Maintaining Your First Aid Kit
Regular Checks and Updates
Keeping our first aid kit stocked and current is something I take seriously. I’ve learned that regularly checking the contents is essential to ensure we’re fully prepared. Every few months, I make it a habit to go through the kit, checking for any items that may be running low or have expired. I found that setting a reminder on my phone helps me keep track of this task, so it doesn’t slip my mind.
Expiration Dates of Medications
Speaking of expiration dates, I’ve realized that it’s crucial to pay attention to the medications we include in our first aid kit. Many medications, like pain relievers or ointments, have specific shelf lives. I always recommend keeping a list of expiration dates next to the kit for quick reference. It’s a small step, but it can make a huge difference in ensuring we’re using effective products when we need them most.
Restocking After Use
After an incident where we used some supplies from our kit, I learned the importance of restocking right away. It’s easy to forget until the next emergency arises, but I try to replenish any used items immediately. This way, I know we’re always prepared for the unexpected. I’ve found that keeping a checklist of items helps me stay organized and ensures nothing gets overlooked.
When to Seek Professional Medical Help
Recognizing Serious Injuries and Symptoms
While our first aid kit can handle many situations, I’ve learned that some injuries require professional medical attention. It’s crucial to recognize the signs that indicate when to seek help. For instance, if my child has a deep cut that won’t stop bleeding or shows any signs of infection, I know it’s time to head to the doctor. I also keep an eye on symptoms like high fever, persistent vomiting, or difficulty breathing, as these can signal a more serious issue.
Understanding When Home Care Isn’t Enough
There have been times when I initially thought I could manage an injury at home, only to realize it needed more attention. I’ve learned to trust my instincts; if something feels off or if my child isn’t improving, it’s better to err on the side of caution. I always remind myself that it’s okay to seek help, and I encourage other parents to do the same. Our kids’ well-being is always the priority, and being proactive about their health is essential.
Recommended First Aid Kits for Kids
Top Pre-Made First Aid Kits on the Market
Finding the right first aid kit can feel overwhelming, but I’ve discovered some excellent pre-made options that cater to families with kids. I’ve personally tried a few of them, and they’ve proven to be well-stocked and comprehensive. Some popular choices include the Adventure Medical Kits for Kids, which include age-appropriate supplies, and the Johnson & Johnson All-Purpose First Aid Kit, known for its quality and reliability. These kits save me time and offer peace of mind, knowing I have the essentials covered.
Budget-Friendly Options
Not everyone wants to break the bank on a first aid kit, and I completely understand that. There are budget-friendly options that still contain the essentials. I’ve found that many stores offer generic first aid kits that include the basics—band-aids, antiseptics, and gauze—at a fraction of the cost. I suggest looking for deals or discounts when stocking up on supplies, as it can significantly help keep costs down without sacrificing quality.
Best Kits for Outdoor Activities
If your family enjoys outdoor adventures like hiking or camping, having a specialized first aid kit is a wise choice. I recommend looking for kits that include items tailored for outdoor activities, such as insect bite relief, blister treatment, and even sunburn relief gels. One of my favorites is the Lifeline Trail First Aid Kit, which has everything we need for a day in the great outdoors. Having the right supplies ensures we can enjoy our adventures without worrying too much about the “what-ifs.” Read Interesting article: Master Basic First Aid for Kids: Safety Tips for Parents
Frequently Asked Questions
Why is a first aid kit essential for kids?
A first aid kit for kids is essential because it provides reassurance and allows parents to address minor injuries quickly and effectively. It empowers parents to handle emergencies with confidence instead of panic.
What common injuries should a first aid kit for kids be prepared for?
A first aid kit for kids should be prepared for common injuries such as cuts and scrapes, burns, insect bites and stings, allergic reactions, and fever.
What are the essential components of a first aid kit for kids?
How should a first aid kit be customized for different age groups?
A first aid kit should be customized for age groups by including specific items like infant acetaminophen for infants, fun band-aids for toddlers, instant cold packs for school-aged children, and elastic bandages for adolescents.
Where is the best place to store a first aid kit at home?
The best place to store a first aid kit at home is in a high, secure location that is easily accessible to adults but out of reach of children. Common locations include the kitchen, bathroom, and family car.
What should be included in a travel first aid kit?
A travel first aid kit should include travel-sized versions of essentials like adhesive bandages, antiseptic wipes, necessary medications, and items suited for specific activities, such as insect bite relief for outdoor trips.
What basic first aid skills should every child know?
Every child should know how to clean a wound properly and apply a bandage, recognize when to ask for help, identify signs of serious issues, and contact emergency services if needed.
How often should a first aid kit be checked and updated?
A first aid kit should be checked and updated regularly, ideally every few months, to ensure all items are stocked, current, and effective, including managing expiration dates of medications.
When should parents seek professional medical help for their child?
Parents should seek professional medical help if a child has a deep cut that won’t stop bleeding, shows signs of infection, has a high fever, persistent vomiting, or difficulty breathing.
What are some recommended pre-made first aid kits for kids?
Some recommended pre-made first aid kits for kids include the Adventure Medical Kits for Kids and the Johnson & Johnson All-Purpose First Aid Kit, both of which offer age-appropriate supplies and reliability. Read Interesting article: Quick First Aid Tips for Kids: A Parent’s Guide
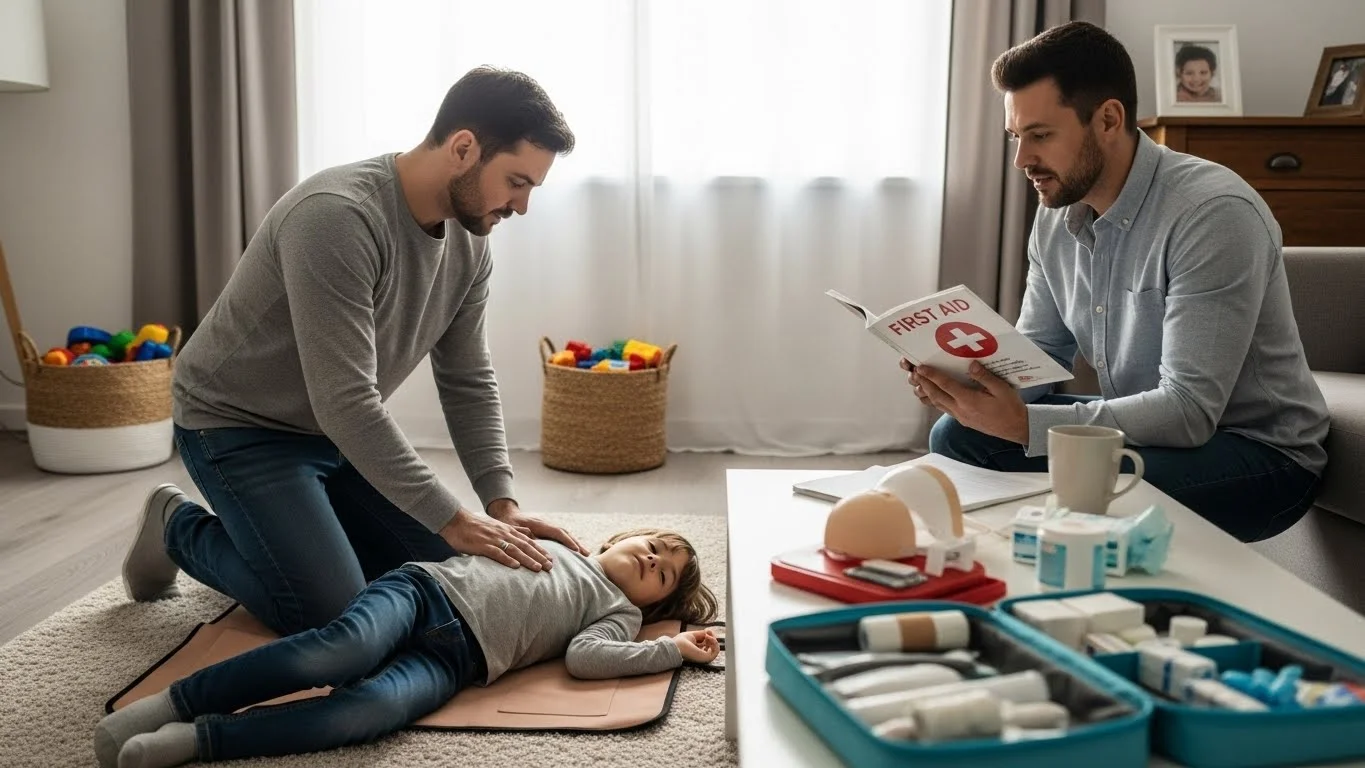
As a parent, knowing basic first aid can feel like a superhero skill. It gives us the confidence to handle emergencies, ensuring our little ones stay safe and healthy. Let’s explore essential first aid techniques every parent should know, along with some helpful resources like Master Positive Discipline Techniques for Happy Parenting.
Essential First Aid Techniques Every Parent Should Know
Understanding Basic First Aid
What is First Aid?
First aid is the initial assistance provided to someone who is injured or ill before professional medical help arrives. It includes simple, often life-saving techniques that can be performed with minimal equipment. The beauty of first aid lies in its accessibility; anyone can learn it, and sometimes, those few minutes of care can make all the difference. I remember the first time I faced a small emergency involving my child. It was a moment of panic, but knowing the basics helped me stay calm and act quickly.
The Importance of First Aid for Parents
As parents, we wish to shield our children from harm and nurture their growth. However, accidents happen, and it’s crucial to be prepared. The importance of first aid for parents cannot be overstated; it empowers us to respond effectively to common childhood injuries or emergencies. I’ll never forget when my toddler took a tumble and scraped his knee. Because I knew how to assess the wound and clean it properly, I was able to ease his pain and prevent infection. This kind of knowledge not only helps in emergencies but also builds our confidence as caregivers.
Essential First Aid Techniques
CPR (Cardiopulmonary Resuscitation)
CPR is a vital skill every parent should learn. It can be the difference between life and death in cases of cardiac arrest. For infants and children, CPR techniques differ slightly from those used for adults. I remember taking a CPR class, and it was eye-opening to learn how to perform chest compressions and rescue breaths properly. Here’s a quick breakdown:
For infants, use two fingers to press down in the center of the chest, about 1.5 inches deep, at a rate of 100-120 compressions per minute.
For children aged 1-8, use one hand for compressions at a depth of about 2 inches, maintaining the same rate.
For older children and adults, use both hands and press down at least 2 inches deep.
Learning CPR not only prepares you for emergencies but also provides peace of mind. I feel more secure knowing I can help my children in a crisis. For more parenting strategies, you can check out Unlock Better Conversations with Active Listening Techniques.
Choking Relief for Children
Choking is a scary situation for any parent. I’ve seen firsthand how quickly a child can choke on food or toys, and it can be terrifying. It’s important to know how to respond. For infants, use the back blows and chest thrusts method: hold the baby face down on your forearm, supporting the head, and deliver five gentle back blows between the shoulder blades. If that doesn’t work, flip the baby over and give five chest thrusts, using two fingers in the center of the chest. For older children, the Heimlich maneuver can be used. Stand behind them and wrap your arms around their waist. Make a fist with one hand and place it above the navel, then thrust inward and upward until the object is dislodged. I practiced this technique with my partner so we could both feel prepared.
Wound Care and Bandaging
Accidents happen, and knowing how to care for wounds is essential. When my daughter fell off her bike and scraped her elbow, I was grateful for my wound care knowledge. Here’s what I learned:
First, wash your hands to avoid infection.
Clean the wound gently with soap and water to remove dirt and debris.
Apply an antiseptic and cover it with a bandage to keep it clean. I keep a variety of bandages on hand for different sizes and types of wounds.
It’s helpful to explain the process to your child, as it can make them feel more comfortable. I always try to keep it light and encourage my kids to choose their favorite band-aid to make it a little less scary.
Managing Burns and Scalds
Burns and scalds can happen in an instant, especially in the kitchen. Knowing how to treat them is crucial. If my child burns themselves, I remember to do the following:
Run cool (not cold) water over the burn for at least 10 minutes.
Do not apply ice, butter, or ointments, as this can worsen the injury.
Cover the burn with a clean, non-stick bandage.
In case of severe burns, I’ve learned to seek medical help right away. Even minor burns can be painful, and I find that comforting my child and reassuring them helps a lot. I also make it a point to keep hot liquids and sharp objects out of reach to prevent such accidents.
Recognizing and Treating Allergic Reactions
Allergic reactions can range from mild to life-threatening, and it’s important to recognize the signs. I’ve had moments where my child’s skin started to break out in hives after trying a new food. Knowing how to react helped me stay calm. For mild reactions:
Remove the allergen immediately.
Administer an antihistamine if available.
Monitor for any worsening symptoms.
However, for severe reactions (anaphylaxis), I’ve learned to use an epinephrine auto-injector if prescribed and call for emergency help. It’s essential to have a plan in place, especially if you know your child has allergies.
Dealing with Sprains and Strains
Kids can be pretty adventurous, which sometimes leads to sprains and strains. When my son twisted his ankle during a game, I followed the R.I.C.E. method: Rest, Ice, Compression, and Elevation. I had him sit down, and I immediately applied ice wrapped in a cloth to reduce swelling. It’s important to keep the affected area elevated and to avoid putting weight on it for a while. I also made sure to check in with him regularly to see if he needed any pain relief.
Basic Treatment for Fractures
Fractures can be serious, and while I hope to never face one, I know what to do if it happens. If I suspect a fracture, I remember not to move the injured area. Instead, I immobilize it with a splint or a makeshift support until I can get to a medical professional. It’s important to remain calm and reassure my child that help is on the way. I always remind myself that children are often more resilient than we think.
Responding to Concussions and Head Injuries
Head injuries can be particularly concerning. If my child falls and hits their head, I look for signs of a concussion, such as confusion, dizziness, or nausea. If any of these symptoms occur, I ensure they see a doctor immediately. I also keep a close eye on them for a few hours afterward. It’s always better to err on the side of caution when it comes to head injuries. I’ve had conversations with my kids about being careful during play to prevent these kinds of accidents.
Common Childhood Injuries and How to Handle Them
Cuts and Scrapes
Cuts and scrapes are some of the most frequent injuries kids face, especially as they explore their surroundings. I remember when my daughter decided to climb a tree and ended up with a small cut on her arm. It was a minor injury, but I knew it was important to treat it properly. Here’s what I learned about handling cuts and scrapes:
First, I gently clean the area with soap and water to prevent infection. It’s amazing how something as simple as washing can make such a big difference.
Next, I apply an antiseptic ointment to help soothe the area and prevent bacterial growth. I often remind my kids that it’s just part of getting better.
Finally, I cover the cut with a bandage. I like to let my kids choose their band-aids to make the process more fun, and it helps them feel like they play a part in their own healing.
Monitoring the cut for signs of infection, like increased redness or swelling, is key. I always tell my kids that if it doesn’t look right, we’ll visit the doctor together.
Insect Bites and Stings
Insect bites and stings can happen in the blink of an eye, especially during the warmer months. I remember a picnic where my son got stung by a bee. It was a bit of a panic moment, but I quickly remembered how to handle it. Here’s what I do:
If it’s a bee sting, I carefully remove the stinger if it’s still in the skin. I use a pair of tweezers to avoid squeezing the venom sac.
Next, I apply a cold pack to reduce swelling and soothe the pain. My kids love it when I let them pick their favorite ice pack—little things make a difference!
If they’re feeling itchy, I administer an antihistamine. For mild reactions, topical creams can help alleviate itching and swelling.
For severe allergic reactions, like anaphylaxis, I’ve learned to be prepared with an epinephrine auto-injector. It’s a lifesaver to have a plan in place, and I make sure to educate my family about the signs to watch for.
Animal Bites
Animal bites, whether from pets or wild animals, can be alarming. We have a friendly dog at home, and I always teach my kids to respect animal boundaries. If a bite does occur, here’s how I handle it:
First, I wash the bite area thoroughly with soap and water to minimize the risk of infection.
Then, I apply an antiseptic and cover it with a clean bandage.
If the bite is deep or bleeding heavily, I apply pressure to stop the bleeding. In such cases, I remind myself to seek medical help.
It’s crucial to monitor for signs of infection or unusual swelling. I always explain to my kids the importance of reporting bites right away, no matter how small they might seem.
Sunburn and Heat Exhaustion
As summer approaches, sunburns and heat exhaustion become real concerns. I’ve seen my kids come back from playing outside a little too long in the sun, and it has made me more vigilant. Here’s how I address these issues:
For sunburn, I apply aloe vera gel to soothe the skin. I also keep my kids hydrated with plenty of water. Staying cool helps them feel better.
If I notice they’re getting too hot, I take them indoors to rest in a cool place. I always keep an eye out for symptoms of heat exhaustion, such as dizziness or excessive sweating.
The sun can be deceptive, so I’ve made it a habit to apply sunscreen regularly, and I encourage my kids to wear hats when playing outside. Prevention is key!
Fever Management
Fever can be a common occurrence in children, and knowing how to manage it is essential. I remember the first time my child had a fever; I felt a wave of worry. Here’s my approach:
I check their temperature using a digital thermometer. I’ve learned to remain calm, as most fevers are not dangerous.
If the fever is high or causing discomfort, I give them appropriate doses of fever-reducing medication like acetaminophen or ibuprofen. I always follow the dosage instructions carefully.
I ensure they stay hydrated by encouraging them to drink plenty of fluids. Water, electrolyte solutions, and clear broths are great options.
Keeping them comfortable, with light clothing and a cool cloth on their forehead, has been helpful. I also keep an eye out for other symptoms that might require medical attention, like persistent high fever or unusual behavior.
First Aid Kit Essentials for Parents
Must-Have Items for a Home First Aid Kit
Having a well-stocked first aid kit at home is something every parent should prioritize. I’ve found that having the right supplies on hand saves time and reduces stress when minor emergencies arise. Here’s a list of must-have items that I consider essential for our family’s first aid kit:
Adhesive bandages: I always keep a variety of sizes to cover cuts and scrapes. My kids love choosing their favorite designs!
Antiseptic wipes or solution: These help clean wounds and prevent infections, which is crucial after a scrape or cut.
Gauze pads and tape: For larger wounds, I’ve found that gauze pads paired with medical tape are invaluable.
Antibiotic ointment: This has been a lifesaver for preventing infections, especially when my kids have minor injuries.
Thermometer: Having a reliable digital thermometer is key for checking fevers and assessing health.
Ice pack: A reusable ice pack is great for reducing swelling from bumps and bruises.
Pain relievers: I keep age-appropriate options like acetaminophen and ibuprofen for relief from pain and fever.
Elastic bandage: This is perfect for sprains or strains, as it provides the right support while allowing some flexibility.
Scissors and tweezers: I can’t tell you how many times I’ve needed scissors to cut tape or gauze, and tweezers are essential for removing splinters.
First aid manual: Having a guide on hand can help jog my memory in a moment of panic.
Every time I check our first aid kit, I feel a sense of relief knowing I’m prepared for various situations. It’s part of being a responsible parent.
Traveling with a First Aid Kit
When we go on family trips, I make sure to take a portable first aid kit with us. I’ve learned the hard way that minor injuries can happen anywhere! Here’s what I include in our travel kit:
SMALLER SIZE: I usually opt for a compact version that’s easy to fit in our luggage or the car.
Basic supplies: The essentials like adhesive bandages, antiseptic wipes, and pain relievers are a must.
Motion sickness medication: This has come in handy during long car rides or flights!
Sunblock and aloe vera: Protecting our skin is crucial, especially on sunny vacations.
Bug repellent: I try to keep my kids bite-free, especially when we’re outdoors.
Having these items while traveling gives me peace of mind, knowing that I can handle small emergencies while away from home. I encourage other parents to customize their travel kits based on their family’s needs.
How to Maintain and Update Your First Aid Kit
Keeping a first aid kit up-to-date is just as important as having one in the first place. I make it a habit to check our kit regularly and replace any used or expired items. Here are a few tips I follow:
Regular checks: I set a reminder every few months to go through our kit. This helps me ensure everything is in good condition and stocked up.
Replace used items: After any incident, I replace what we’ve used immediately. It keeps us prepared for the next time.
Review expiration dates: I pay attention to the expiration dates on medications and ointments. If anything is expired, I discard it and replace it.
Adapt to our needs: As my kids grow, their first aid needs change. I adjust the contents of our kit to reflect their current activities and potential risks.
By keeping our first aid kit well-maintained, I feel more confident in handling emergencies. Creating that peace of mind is worth the effort! For effective discipline techniques, check out Transform Tantrums: Effective Discipline Techniques for Kids.
Frequently Asked Questions
What is first aid?
First aid is the initial assistance provided to someone who is injured or ill before professional medical help arrives. It includes simple, often life-saving techniques that can be performed with minimal equipment.
Why is first aid important for parents?
The importance of first aid for parents cannot be overstated; it empowers them to respond effectively to common childhood injuries or emergencies, ensuring their children stay safe and healthy.
What are the CPR techniques for infants and children?
For infants, use two fingers to press down in the center of the chest about 1.5 inches deep, at a rate of 100-120 compressions per minute. For children aged 1-8, use one hand for compressions at a depth of about 2 inches, maintaining the same rate. For older children and adults, use both hands and press down at least 2 inches deep.
How should parents respond to choking in children?
For infants, hold the baby face down on your forearm and deliver five gentle back blows between the shoulder blades. If that doesn’t work, flip the baby over and give five chest thrusts. For older children, use the Heimlich maneuver by standing behind them, wrapping your arms around their waist, making a fist above the navel, and thrusting inward and upward until the object is dislodged.
What steps should be taken for wound care and bandaging?
First, wash your hands to avoid infection. Clean the wound gently with soap and water, apply an antiseptic, and cover it with a bandage to keep it clean.
How should burns and scalds be treated?
Run cool (not cold) water over the burn for at least 10 minutes. Do not apply ice, butter, or ointments. Cover the burn with a clean, non-stick bandage and seek medical help for severe burns.
What should parents do in case of allergic reactions?
For mild allergic reactions, remove the allergen immediately, administer an antihistamine if available, and monitor for any worsening symptoms. For severe reactions (anaphylaxis), use an epinephrine auto-injector if prescribed and call for emergency help.
What is the R.I.C.E. method for managing sprains and strains?
The R.I.C.E. method stands for Rest, Ice, Compression, and Elevation. Rest the affected area, apply ice wrapped in a cloth, compress it, and keep it elevated to reduce swelling.
What are the must-have items for a home first aid kit?
Essential items include adhesive bandages, antiseptic wipes, gauze pads and tape, antibiotic ointment, a digital thermometer, an ice pack, pain relievers, an elastic bandage, scissors, tweezers, and a first aid manual.
How can parents maintain and update their first aid kit?
Parents should regularly check their kit, replace used items immediately, review expiration dates, and adapt the contents to reflect their children’s current activities and potential risks.
Uninvolved parenting, also known as neglectful parenting, is a style characterized by a significant lack of responsiveness and engagement with a child's emotional and developmental needs [1]. This...
5Permissive and authoritative parenting represent two distinct styles that significantly impact child development [1]. Permissive parenting is characterized by high warmth and low boundaries, while...